Ever since my first days in the United States, I have not been comfortable with food packed in bags. Not that I did not like it — I actually loved it. But that food was intimidating — so new and different. When we were out for dinner to family or friends’ houses, I always admired tasty trail mixes, chips, pretzels, and popcorn like one would admire little brown cubes astronauts consume in outer space. When shopping, for some reason, I’d never see these bags on the shelves which made me feel inferior and more fascinated. It is now that I understand why.
On my food shopping trips, I strictly followed my shopping lists and those bags were not on my lists because I did not know to put them on. That prompted complaints from my children, especially Anton, during his termite middle school years: ”There’s nothing to eat in the house!”
Lately, with our children on their own, I sunk to a new “low” and stopped buying cans, with the exception of tuna and tomatoes. Not sure how that happened. Probably noticed the salt content on the labels.
We cook Mexican food a lot and, without cans, beans became a problem. That overnight soaking would always slip my mind and I’d have to hassle to come up with an alternative to a perfectly planned dinner. Also, dried beans never kept their shape and fell apart when cooked, unlike beans from a can.
Then, came the baking soda trick and everything changed.
Soaked beans fall apart because their tough skin requires time to soften while tender flesh absorbs water, quickly exploding the skin. Baking soda — about 1 tablespoon per 1 quart of water — softens the skin and keeps beans in shape.
Over the course of time, I’ve come up with my own way to always have beans ready without having to buy cans.
Dried beans go into soaking with baking soda as soon as they get home. All of them — no matter how much there is. And I forget about them until the next morning.
Since the next step takes a couple of minutes, the next morning my alarm goes off a few minutes earlier than usual. As my tea kettle is heating up my morning tea, I drain the beans, cover them with clean water, add a tablespoon of salt to each pot, and turn the flame on. And back to my morning routine — dress up, make up, breakfast.

This sieve from Williams-Sonoma can hold up to 3 pounds of soaked beans. Those little legs let it stand in the sink with no additional support or protection and make rinsing easy and quick.
As the water starts boiling — and it is different for each pot: one can be on a lower BTU burner, another can have more beans in it or have a wider/narrower opening — I turn the burners off and cover the pots. In about 15 min, all pots are usually covered, the burners are off, and I go to work.
After work, whenever there’s time — before or after dinner — I rinse the beans, pack them in bags, and take them to the freezer. No, they are not cooked. But after this treatment, whenever there’s a need for a quick meal — 5-10-15 min — depending upon the bean — dinner is on the table. And … these multiple water baths eliminate the problem of flatulence…
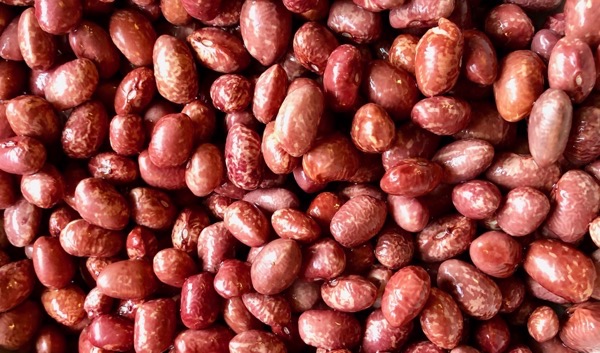
Since quitting cans, I’ve even started distinguishing the flavor and texture of different beans. These are my favorite so far.

My #1 — Cargamanto Rojo — so creamy and nutty! And beautiful to the eye. They really keep their shape well for presentation.

Runner-up — Central American Red Beans or Rojo de Seed — chewy and bright.

Dominican Red Beans or Habichuelas Rojas Dominicanas are in the third place — mild and so giving into the flavors you add.

Chick peas/Garbanzos — versatile as they are — always in the freezer ready to top a salad, be turned into hummus, added to a soup, or roasted with spices for a snack. That pot takes the longest to get to a boil as it usually hold 3 pounds, at least.
The amount of beans you cook depends upon the space in your freezer. We are lucky to have a big one in our basement, so instead of reaching for a salt-packed can, I go for a bag in the freezer.
It also helps to find a market with a high turnover of beans. We are lucky to live close to Paterson’s Railway Avenue with its ethnic markets.
MY WAY WITH BEANS IN A NUTSHELL
1. Cover dried beans with twice the amount of water, add 1-2 Tbsp of baking soda and go to bed.
2. Wake up a little earlier, drain and rinse your beans. Add twice the amount of water, add 1 Tbsp of salt, do not cover, turn the burners on, and go about your morning routine, walking by the range/cooktop every so often. After the water starts bubbling, turn the flame off, cover the pots, and go to work.
3. Once back home, at some point, drain, rinse, and pack beans for the freezer. No, they are not cooked. When you need them, put them — frozen — into water, bring to a boil, and in 5-10-15 minutes — depending upon the kind of beans, just keep tasting for the chalkiness to go away — you’ll have your dinner.

